Reading Time 5 mins
Updated on Sat, 10 Aug 2024
By
BullMQ implementation in Nodejs with Redis & Docker | Efficient Job Queuing solution
BullMQ, A fast and efficient Job queuing solution for scaling your microservices. It is a Node.js library that is built on top of Redis that helps to solve many problems related to microservices architecture.
What is BullMQ
As we already discussed, it's a job queuing solution for scaling your microservices. Bull MQ is used by many organizations, whether they are small or big. Here are a few of them, Microsoft, Vendure, Data Wrapper and CURRI.
It is used in microservices for communication purposes. So by using this technology in your microservice architecture, you can build a communication in between them to transfer the data, also known as messages.
So now I assume that you have understood what exactly is BullMQ, Now, before moving to the implementation, we should first understand what exactly is Microservice Architecture. And why do we need to build the communication in between them?
info
If you love the stories on Code Architecture, make sure to share them! ✌️❤️
What is Microservice
Microservice architecture is architectural pattern in which we have multiple loosely coupled services. In very simple terms. If you have created any server side project, You might have created it using tightly coupled services Also know that monolithic architecture.
So in monolithic architecture, what exactly we do is We build a complete project with one single code base. Which means there can have multiple services like:
User Login and Registration.
Product Buying and managing user cart.
Payments.
Order tracking
Typically, these are ecommerce services and if you have created any ecommerce application, you might have written all the code for these services in one single code base, Or you can also say that you can access to all the API routes for these services from single server (http://localhost:5000) which can look something like:
Login: http://localhost:5000/v1/login
Registration: http://localhost:5000/v1/registration
Product Buying: http://localhost:5000/v1/product/purchase/123456
This is knows as Monolithic architecture, Where you write all your code in one single folder and which runs on single server!
Whereas microservices is different, in microservice architecture, we create one server for one service, suppose we convert the about ecommerce example in Microservices then it would look like:
Login: http://localhost:5000/v1/login
Product Buying: http://localhost:5002/v1/product/purchase/123456
So here you can see we have created different server for different services.
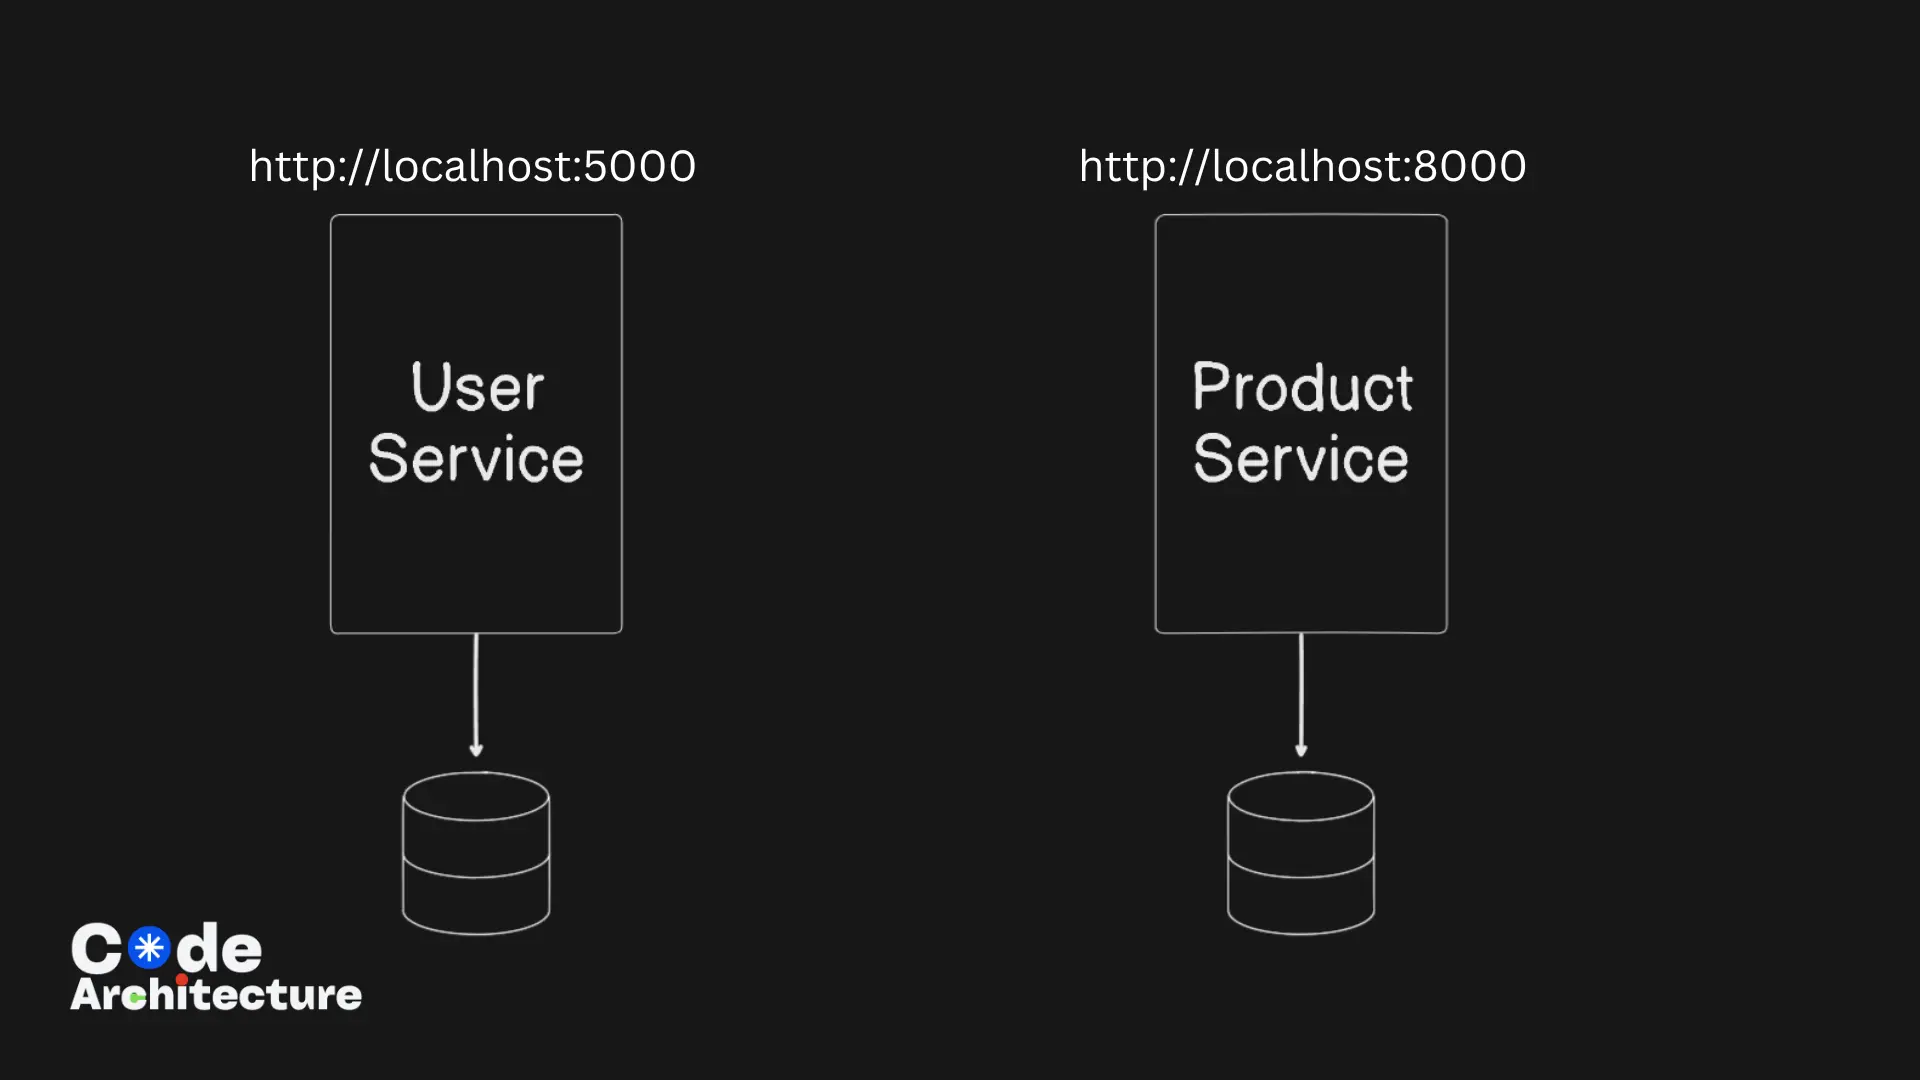
info
Before we start, in this tutorial we will be using Docker and Redis Insight!
Now let's understand the 3 main components of BullMQ:
What is Queue?
In BullMQ the concept of the queue is not different it is the same as we learnt in data structures and algorithm. In message queuing system a queue is used for storing the messages/data. It runs on the principle of first in, first out (FIFO) which means that the first data added to the queue will be processed first
What are Workers in BullMQ?
workers in BullMQ are responsible for processing the jobs, They are capable of handling concurrency, which means they can handle more than one work at a time.
What is Queue Events in BullMQ?
In BullMQ, the Queue events are used for managing and monitoring the state of the job. Which means they can tell you whether the job is completed or failed as well as there are many more events that you can track!
Requirements for Implementing BullMQ
We just required 2 things for implementing BullMQ in Nodejs:
Docker: In this tutorial, we will be using Docker for containerization.
Redis Insight: A user interface that helps you visualize and optimize your data for Redis and Redis Stack.
Setting Up Docker
To download Docker you can visit this link: Download Docker Desktop. Once you download docker you can run the setup and create a new account.
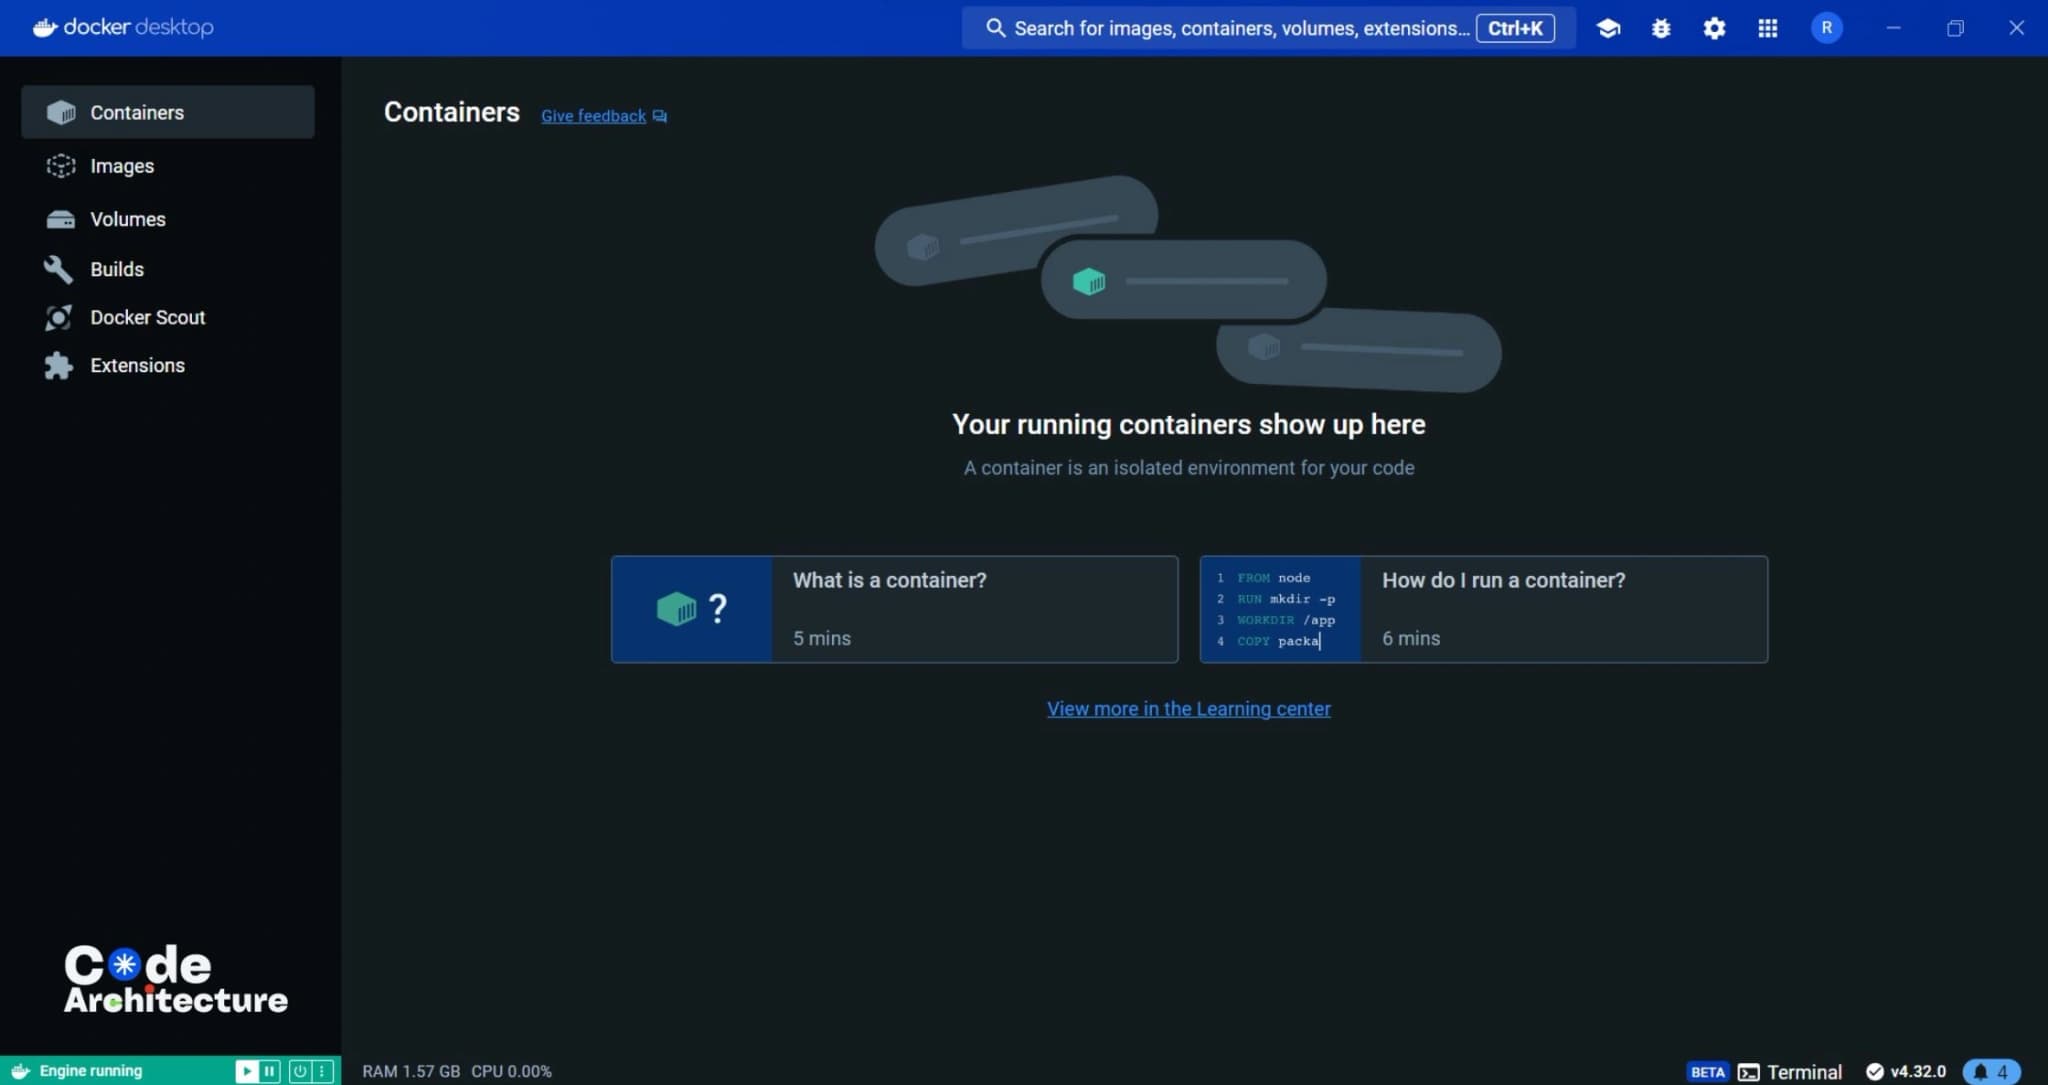
This is how it will look after the fresh installation! Now we are good to go to download and install out next requirement which is Redis Insight.
Installing Redis image
We need to install Official Redis Docker Image as BullMq internally uses Redis for communication. so just run the command and it will install redis as well as it will run redis in container!
If you don't have redis downloaded earlier then it will automatically download it. else it will directly run that in container. and if you open your docker app, you will see one container has up and running as you can see in the figure
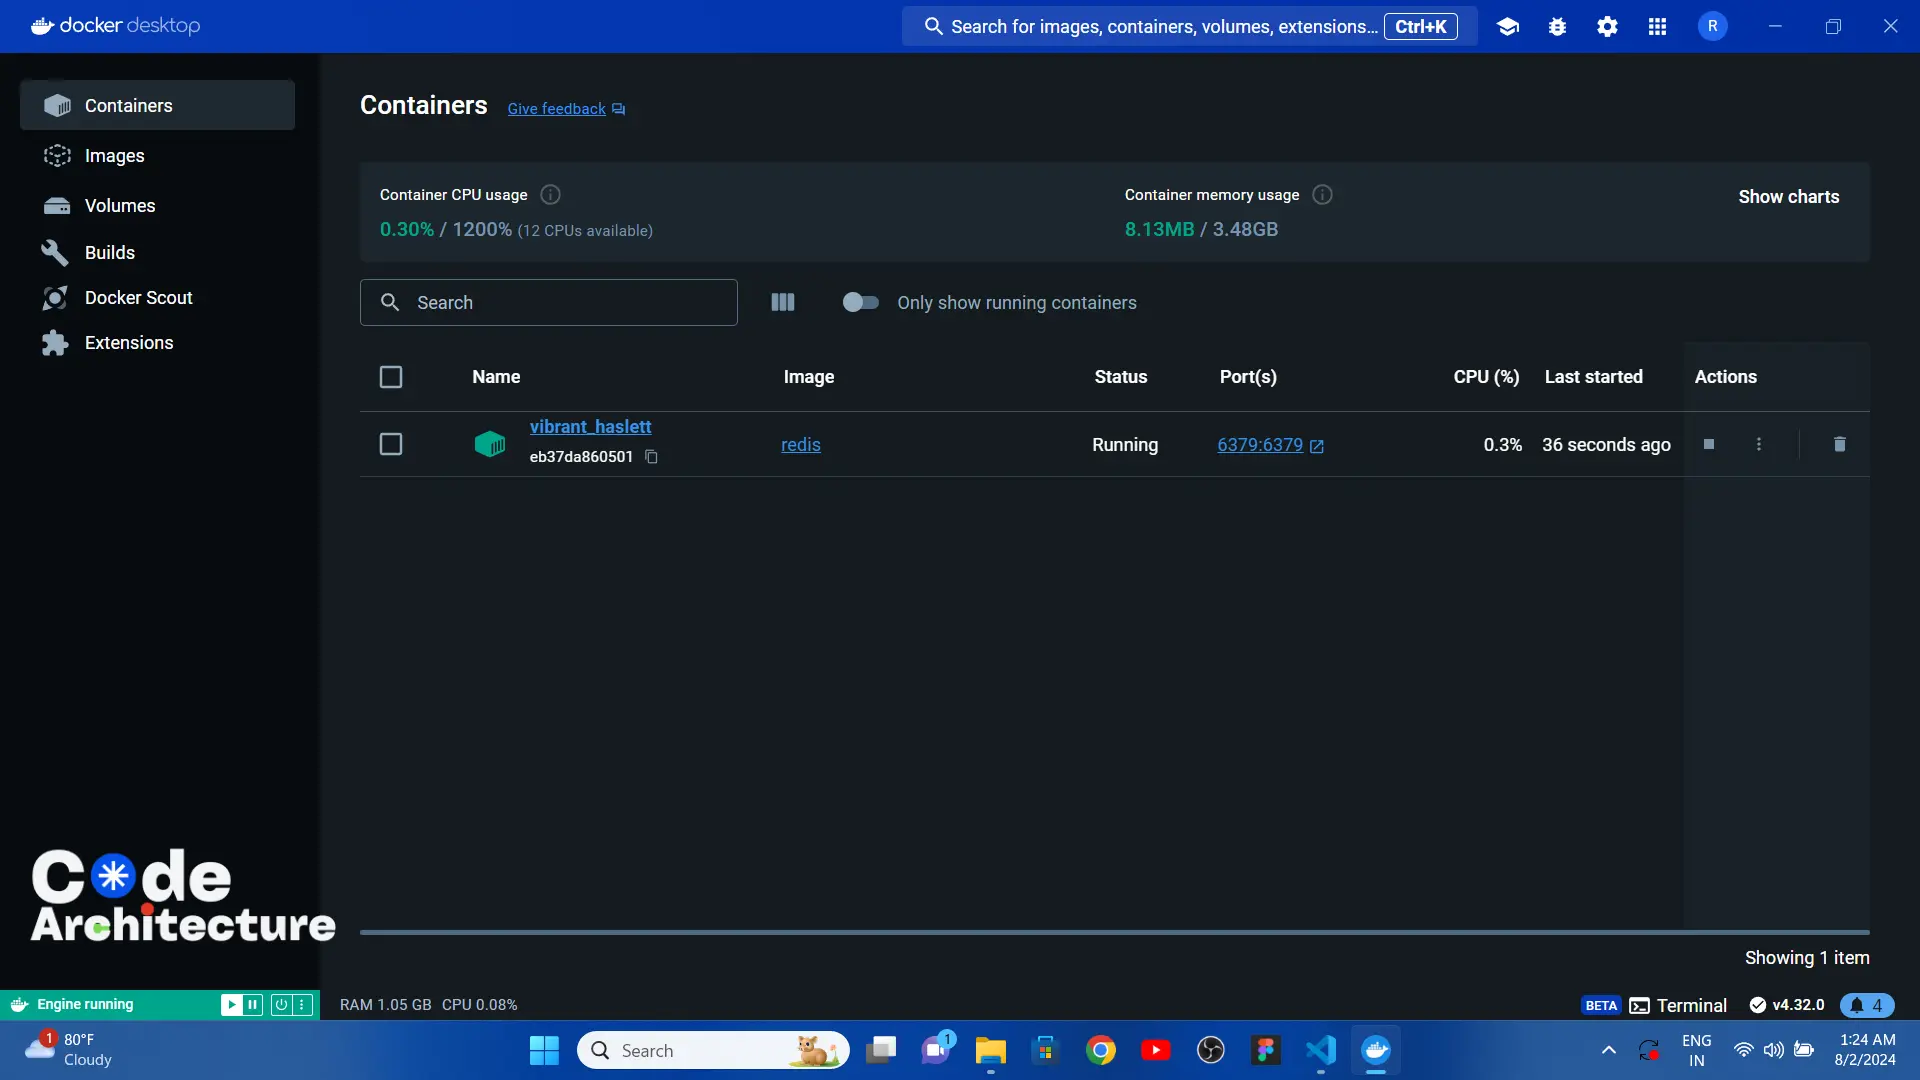
As you can see the redis is running on port 6379. And that's if we have successfully installed and configured redis.
Setting up Redis insight
To download and install Redis Insight, you can visit this link: Download Redis Insight.
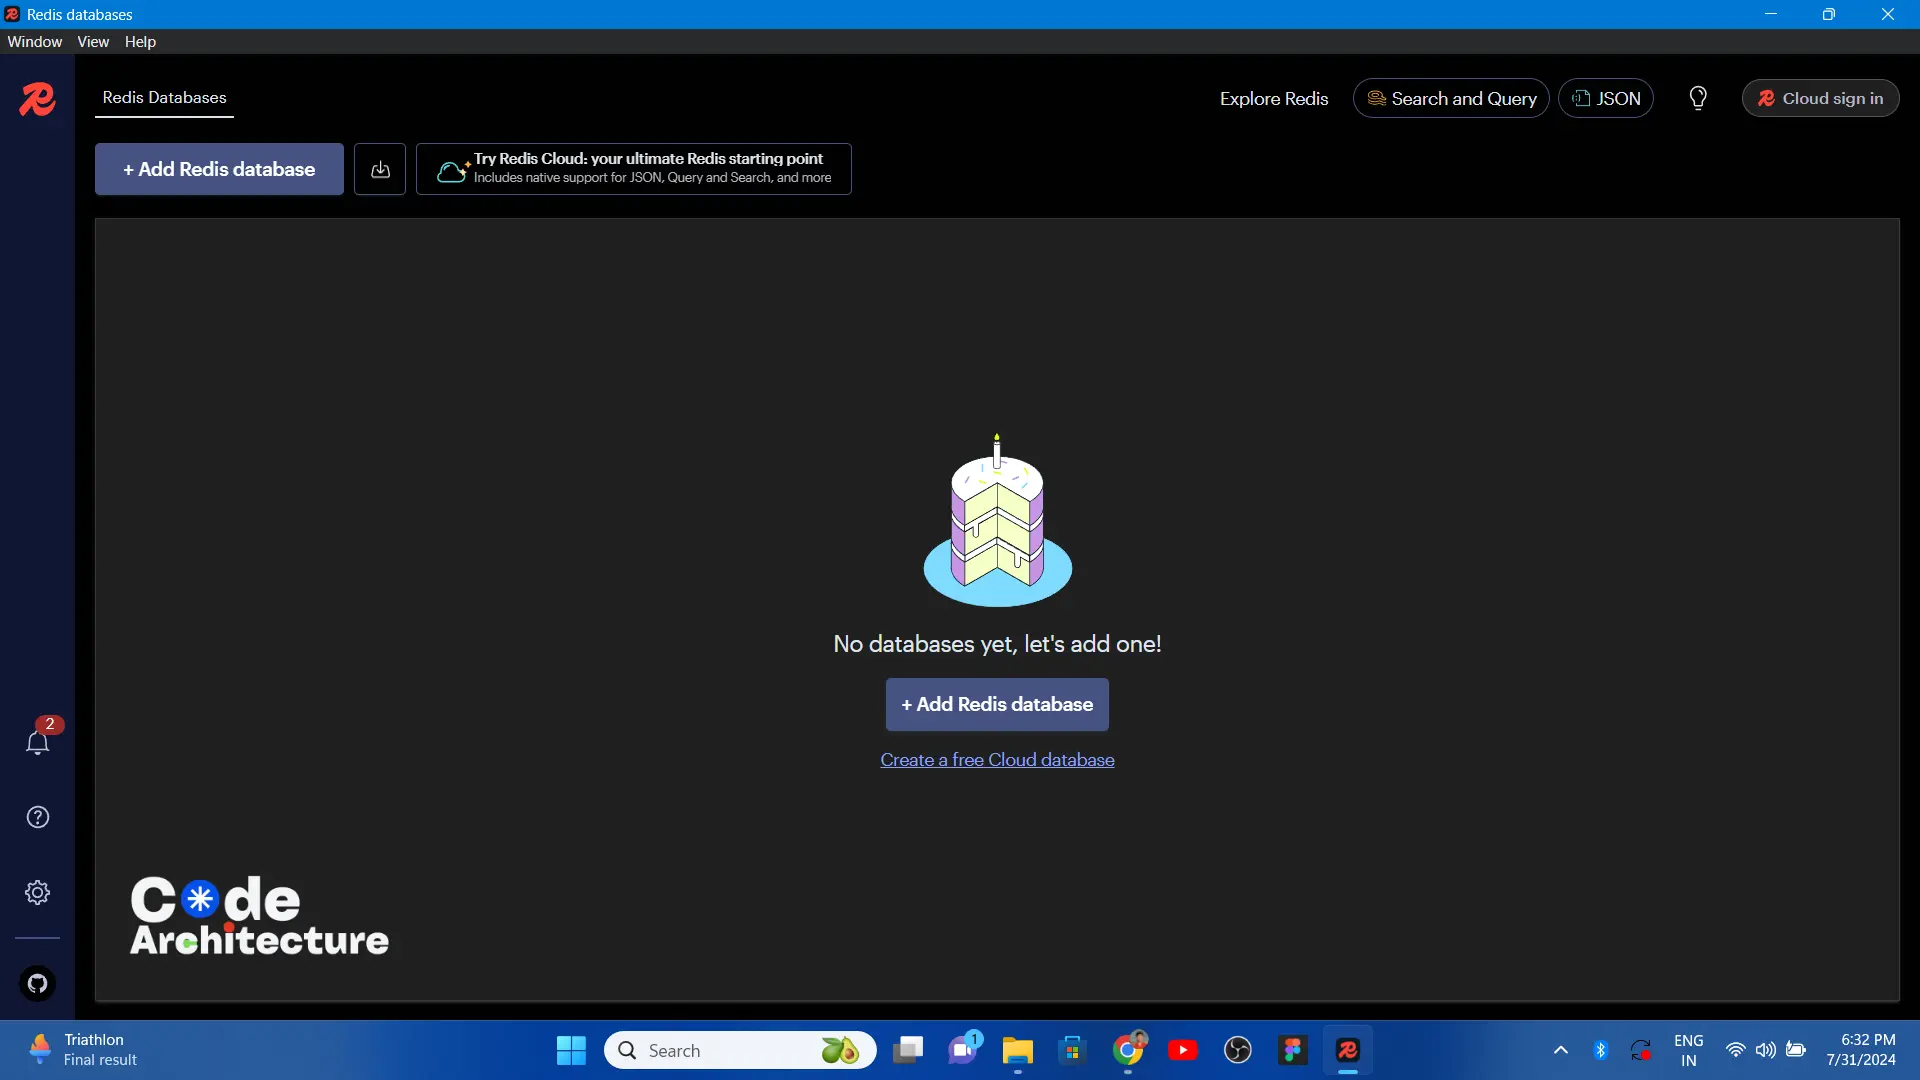
If you see this screen then you have successfully installed Redis Insight, Now lets Add Redis Database so that we can watch all the data which will be stored inside the queue.
Creating the new Redis Database
Click on Add Redis Database and make sure you have did the same configuration as I have did!
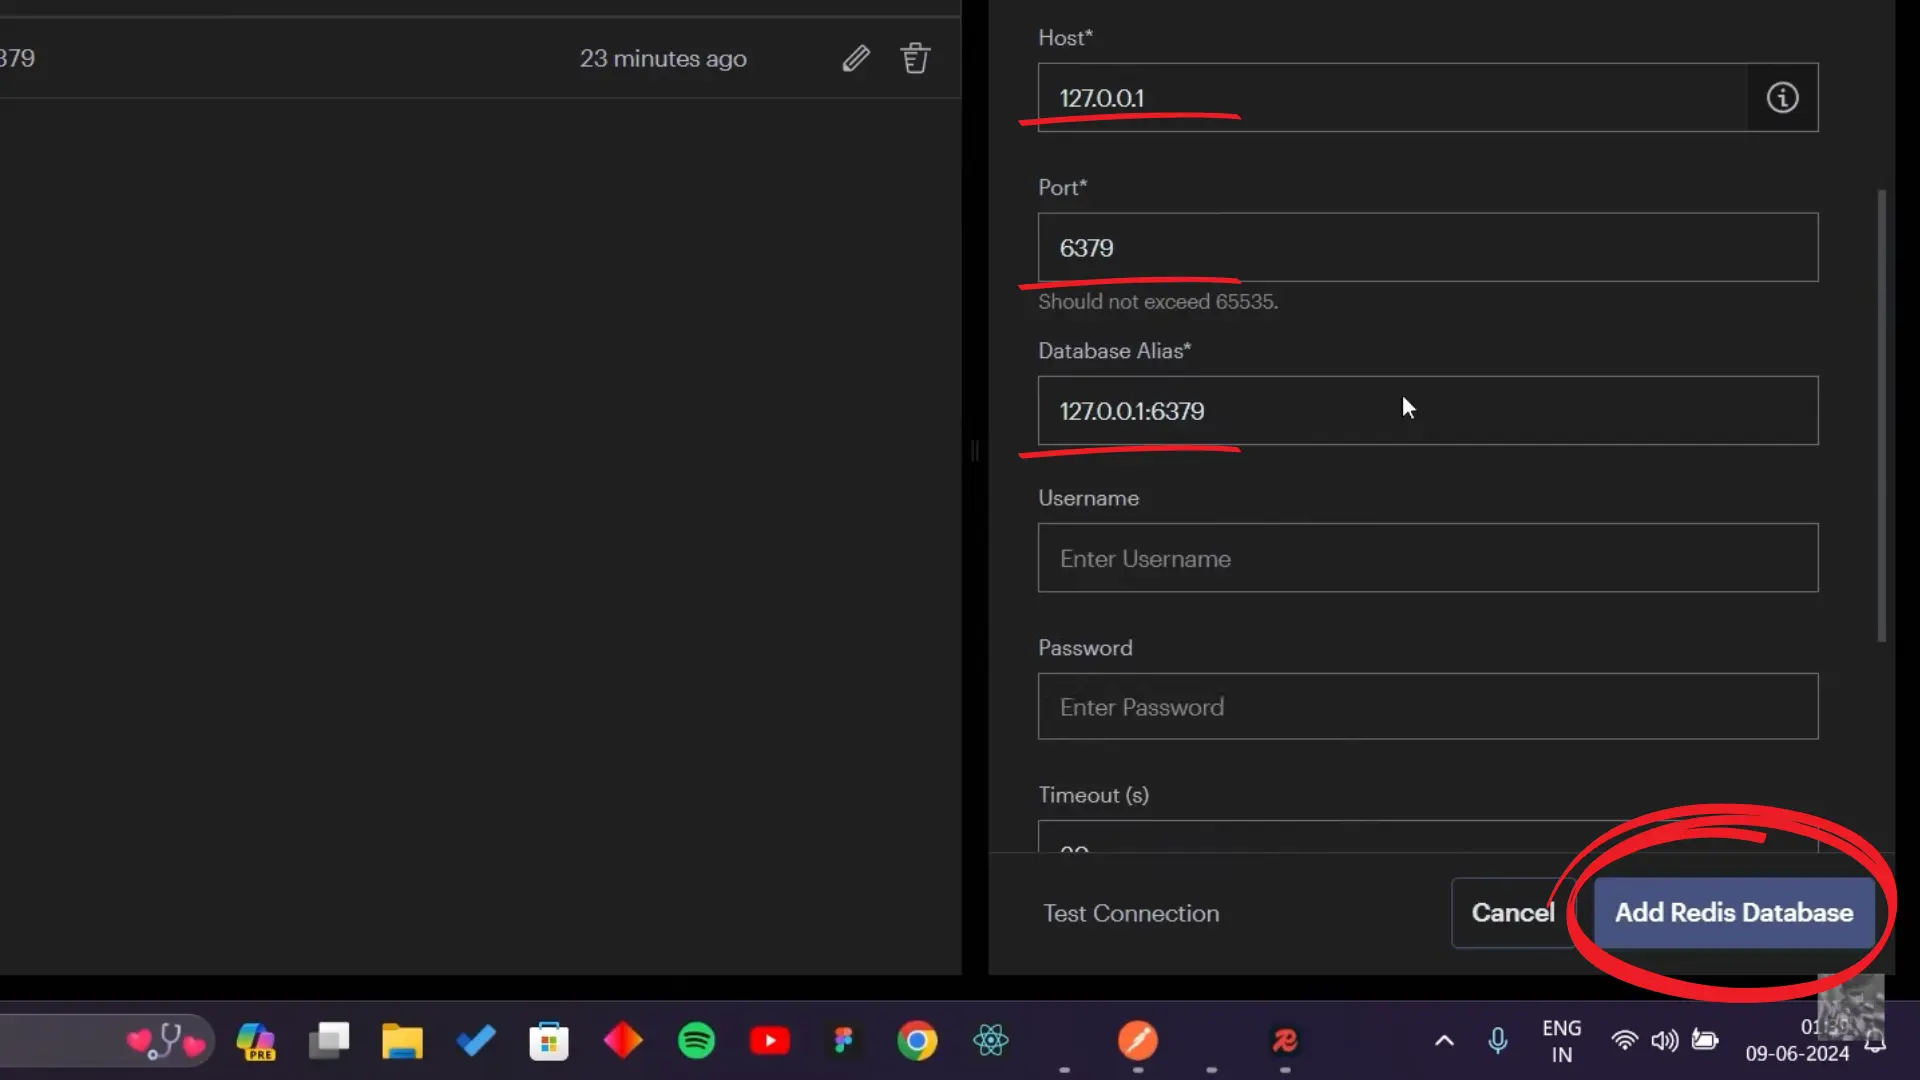
Why do we required Docker and Redis Insight?
Use of Docker for implementing BullMQ
Docker is the most famous platform for building Containerized applications. So basically containerized applications is something like you imagine there is a container and in that single container you can run Operating System (OS), you can create multiple containers, and you can run multiple operating systems in those containers.
Not only operating systems, but we can just define all your required dependencies in that single container. If you want to share your code or project with friends or teammates, you can share the Dockerfile along with your code. They can simply run the Dockerfile, and Docker will automatically install all required dependencies, eliminating version mismatch issues.
So for example: in you project docker file, if you mentioned that this project required Nodejs v20 and you share the code base with your friend. If you friend doesn't have Nodejs v20 install but he has Nodejs v18 still he can run that project.
So under the hood, Docker will create a container and inside of that container, it will install Nodejs V20. So now your friend has Nodejs v20! hurray
info
Soon we are going to write a story on Docker, make sure you are subscribed to Code Architecture to get priority notifications. Subscribe
Use of Redis Insight for implementing BullMQ
Redis Insight is the user interface provided for desktop where users can visualize and optimize data for Redis and Redis Stack.
It also supports Command Line (CLI) interaction, You can watch their official video on YouTube Bite Sized Redis: RedisInsight also you can learn more about redis insight by visiting the official docs
So now we have clearly understood what exactly is docker and redis insight. Now we can move further and set up our environment so that we can code efficiently.
What we are going to build in this tutorial?
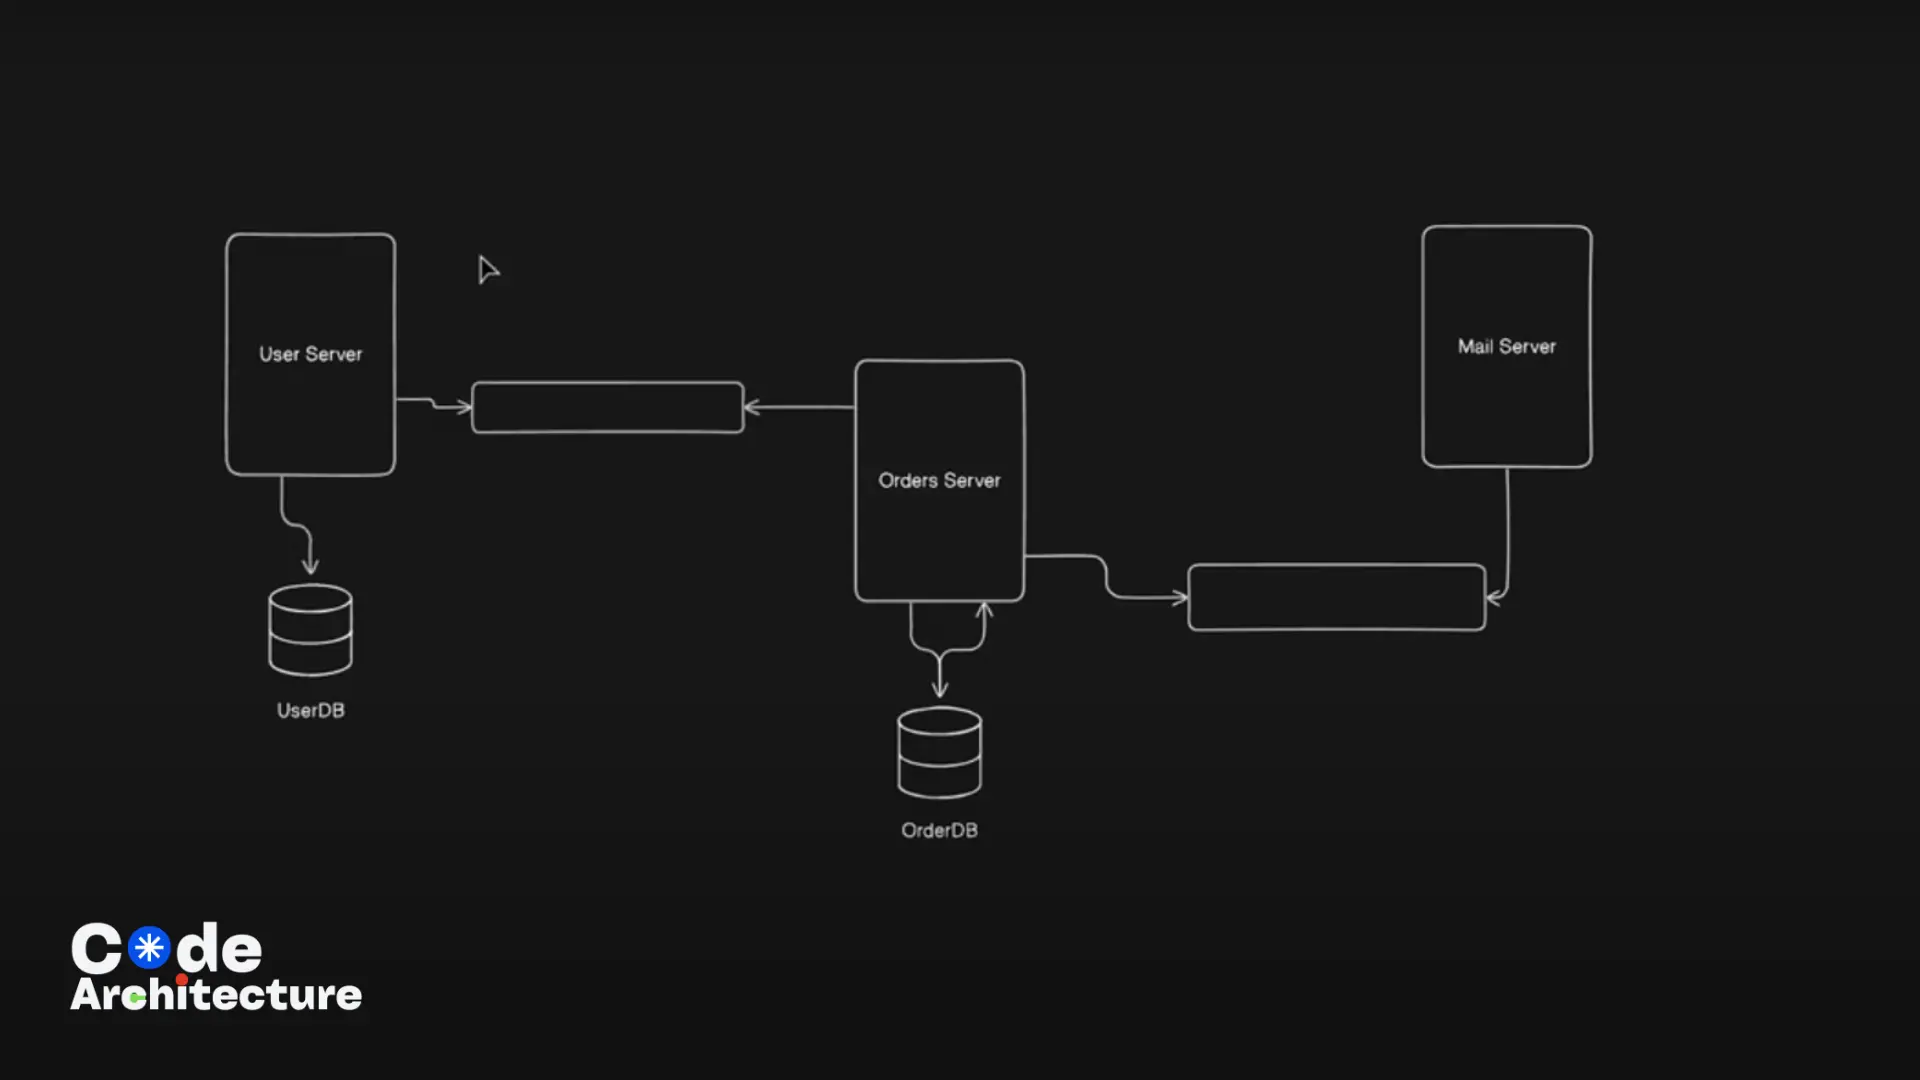
So in this story tutorial, We have built an ecommerce microservice and we are going to set up a communication in between them using BullMQ.
List of all 3 Microservices
Order Server - Manages all orders
User Server - Manages all users and verifications
Mail Server - Responsible for sending mails
Workflow of all 3 Microservices
All the users will hit request on our Product service for purchasing a single product, And the product service is isolated, So the Product Service is unaware of which user has requested to purchase a product.
Product service will try to communicate with User service to validate and verify the user, by placing the UserID, JWT token or any other Unique identifier in the user-verification-queue and the User Service will listen for the event happening in that particular queue. Once the token in placed in the queue, User service will extract the token and verify the user.
info
Here User service has access to user's database, so this service can easily verify the user!
Once verification is completed the message will be sent back to Product Service with the appropriate data. Now Product service has all the required information about the user.
Product Service will save the order to the database. Once order is saved in database, the system or product service wants to send Mail Notification on user's Mail Id.
Now the Product service will Communicate with mail service for sending mails. Similarly we will create a new Queue named mail-queue and will place data inside the queue, This data might contain user information like Mail Id, as well as the product information which the user has purchased.
The Mail Service will keep listening for event happening in that mail-queue and once the data is placed inside the queue, the mail service will take the data from that queue and the service will send mail to that particular user, Informing that the order was placed successfully.
Now let's move towards the coding part.
Implementing 3 Microservices with help of BullMQ in NodeJs
Lets install all required Dependencies:
Installing all required dependencies.
Project structure before installing all dependencies
Before installing any dependencies, your project structure must look something like this.
You must install Express.js and BullMQ in each folder (Product, User and Mail service), You can install those dependencies by using these commands:
Setting up Express.js application
Installing BullMQ
Once you installed all required dependencies, your folder structure, or your project structure, must look something like this:
Project structure after installing all dependencies
Implementing User Service
We will first create a basic server which will run on Port 5001
As in this story tutorial, we are not going to set up any database. So for database operation, we will be using our dummy database just to keep things simple.
Implementing BullMQ worker
Worker is the one who will listen to the particular queue. So we will use the Worker from BullMQ. The worker takes 3 arguments:
Name of the queue to which the worker should listen
Callback function which will run the some data gets placed inside the queue
Connection
The job parameter in callback will give us all the data which was in the queue! In our case we will just receive the User Id or JWT Token:
Now by using vanilla Javascript, we will simply verify the user:
info
You can write your own logic in the callback function
I that's it!! we have successfully implemented the User Service, Let's see how to complete code looks
Implementing Mail Service
In the very similar way, we will create a simple server which will be running on port 5002 and we will implement a worker same as we implemented in User Service just the functionality will be different!
Let's directly go through the code.
Implementing Product Service
So you might be wondering this service would also be the same as user & mail, but the answer is NO! So we are not going to write the worker in this service. This service will be responsible for sending the data into the queue. Let's understand in few small steps.
Creating Queues
To communicate with other microservices (User and Mail) we need to create a queue. So you have to create a queue inside that service which is going to place the data inside the queue. Lets see the code!
So we will extract the Queue from BullMQ and as you can see on line number 10 & 11 we have created two queues. After this, we will create an endpoint where user will set the request.
So if we just take a look at this API endpoint, you can see we are destructuring some data from the body. currently I am destructuring (orderId, productName, price, userId)
info
To keep things simple, I am using user ID and not JWT token. But you have to use JWT token.
How to send data to the Queue?
To send data to the queue we can use the add method on the queue to send it, as you can see on line no 7
How to wait for the response from different service?
First Instantiate a new Queue Event by new QueueEvents("user-verification-queue") Then we have created a function checkUserVerification this function will return the Promise and inside will check for two main events:
completed: This event will trigger when the worker from another server has successfully returned!
failed: This event will trigger when the worker causes some error.
This condition checks whether the response we received from the server corresponds to the same job/data that we sent to the queue.
Now We have successfully implemented a mechanism which will send data to user verification queue and when user verification queue sends any response back, then our checkUserVerification will check for the completed and failed event!
Here isValidUser is boolean and rest is Object which contains the user information like name, mail, address, etc.
Let's see the complete code now!
Now here, you can see that we are sending the dummy data to the mailQueue on the line number 48.
info
I am using Dummy data, for keeping things simple
After sending the data to the queue, we are sending the response for our API Without waiting for the response from mail server! This is known as asynchronous communication, here we don't wait for the response!
Output
Run all the 3 servers by using command node app.js
Open Postman or any other API testing tool and create a POST request to /order route, and send data from the Body, have a look at the below image
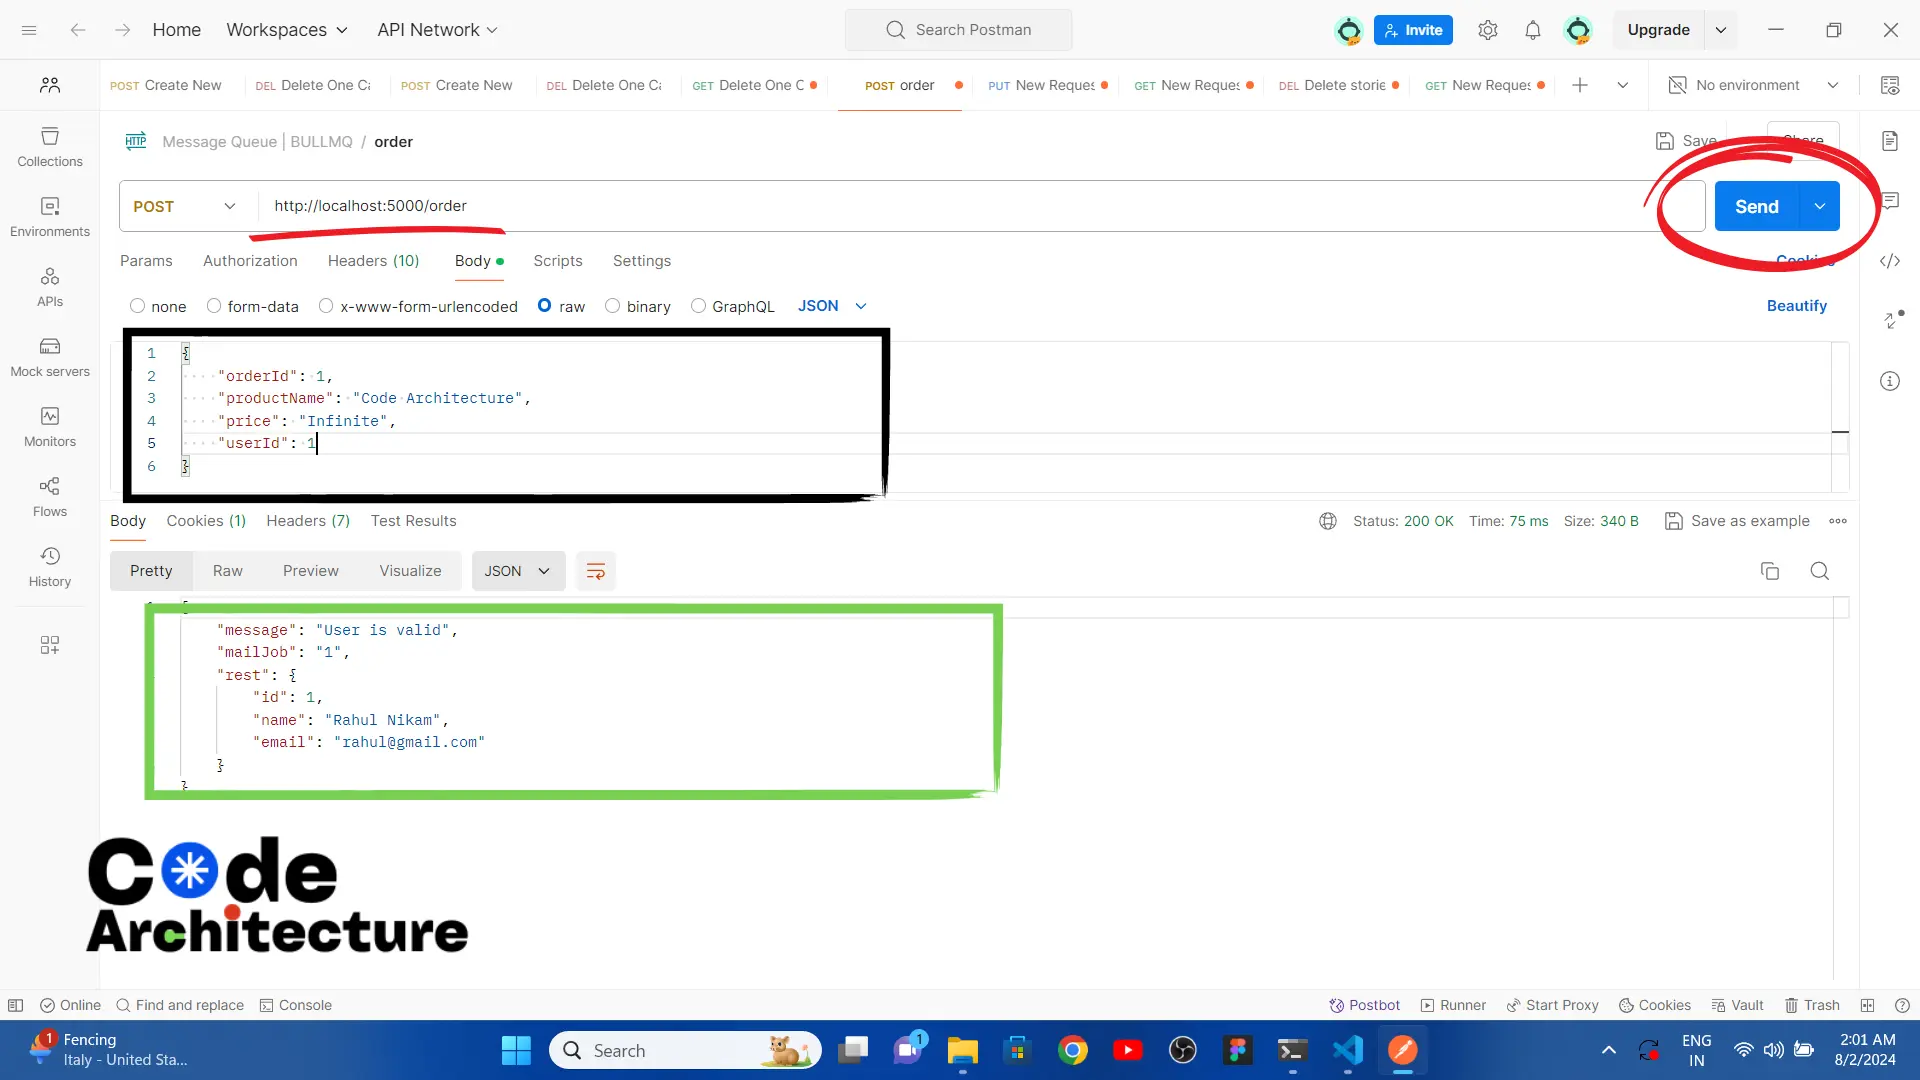
and now if you see the terminal you can see all the console logs printed their!
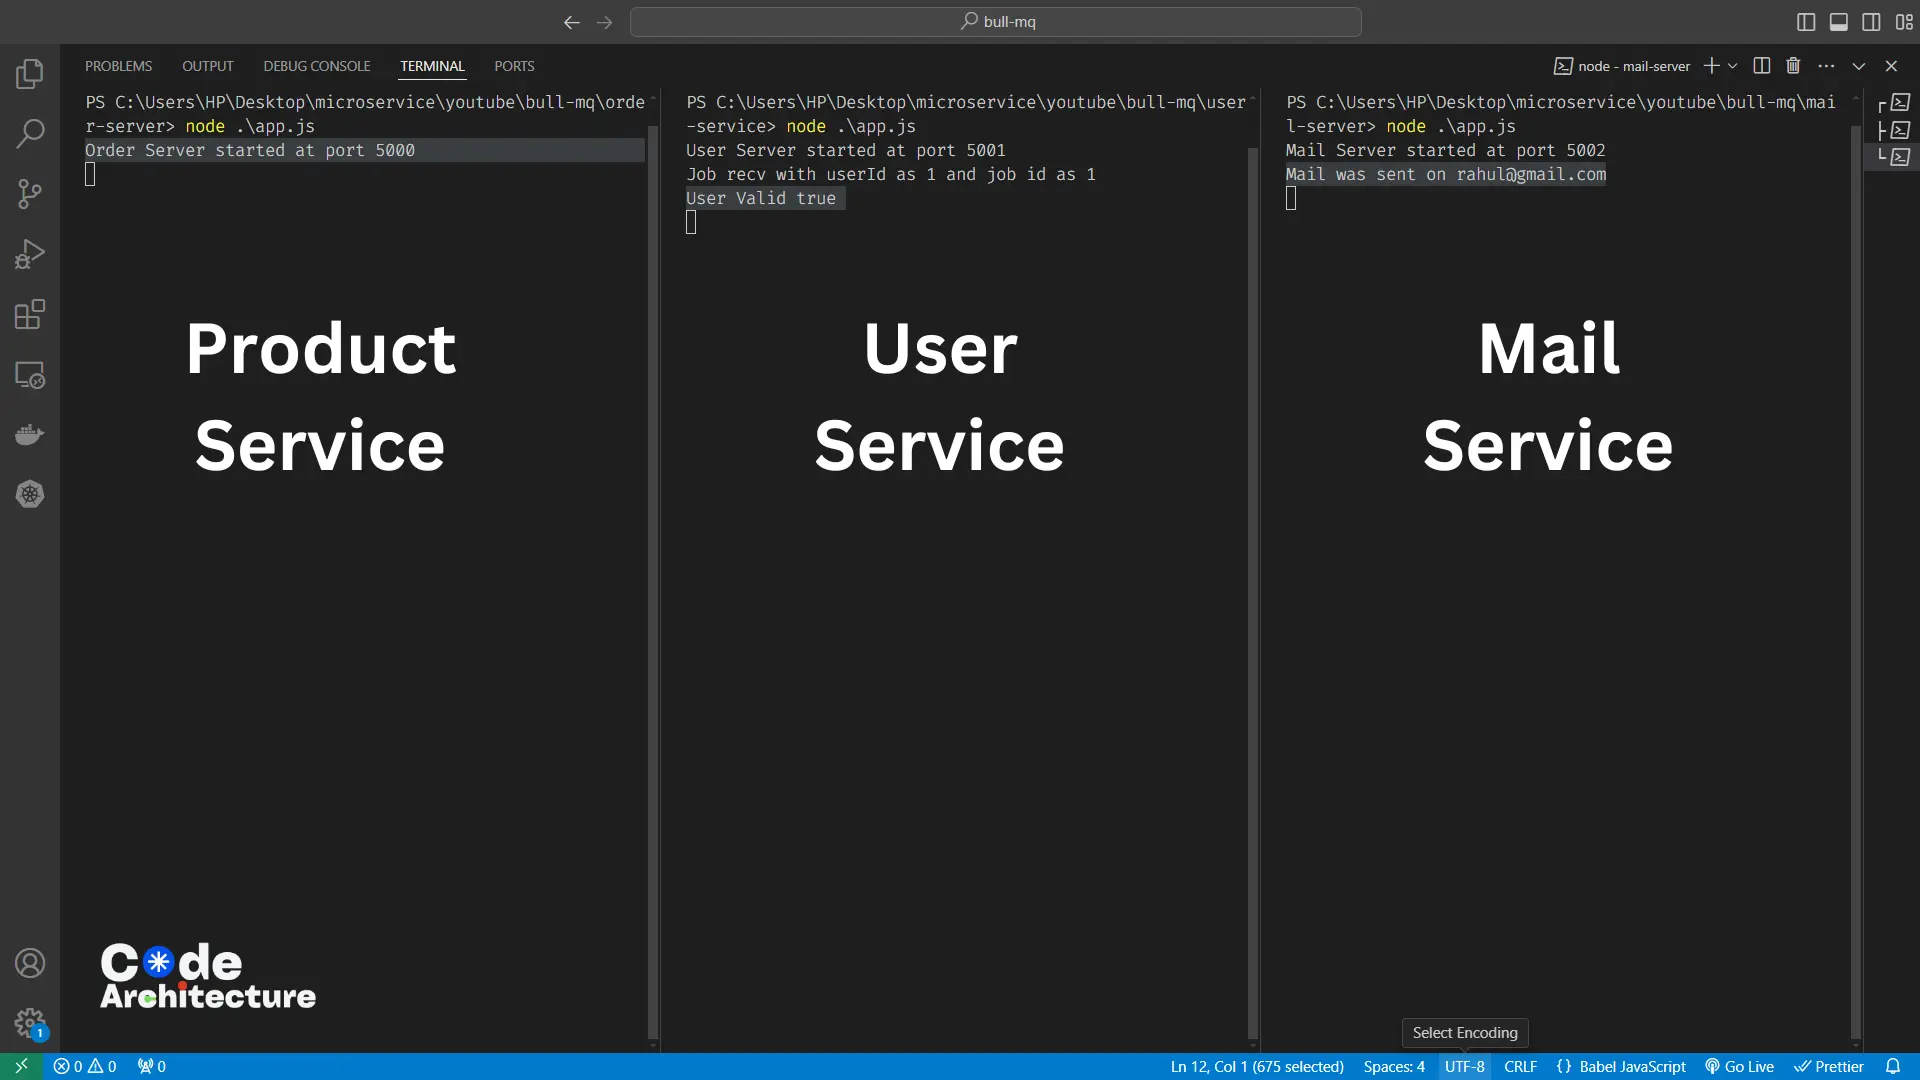
This is how we can make use of BullMQ as a message broker for communicating between different microservices.
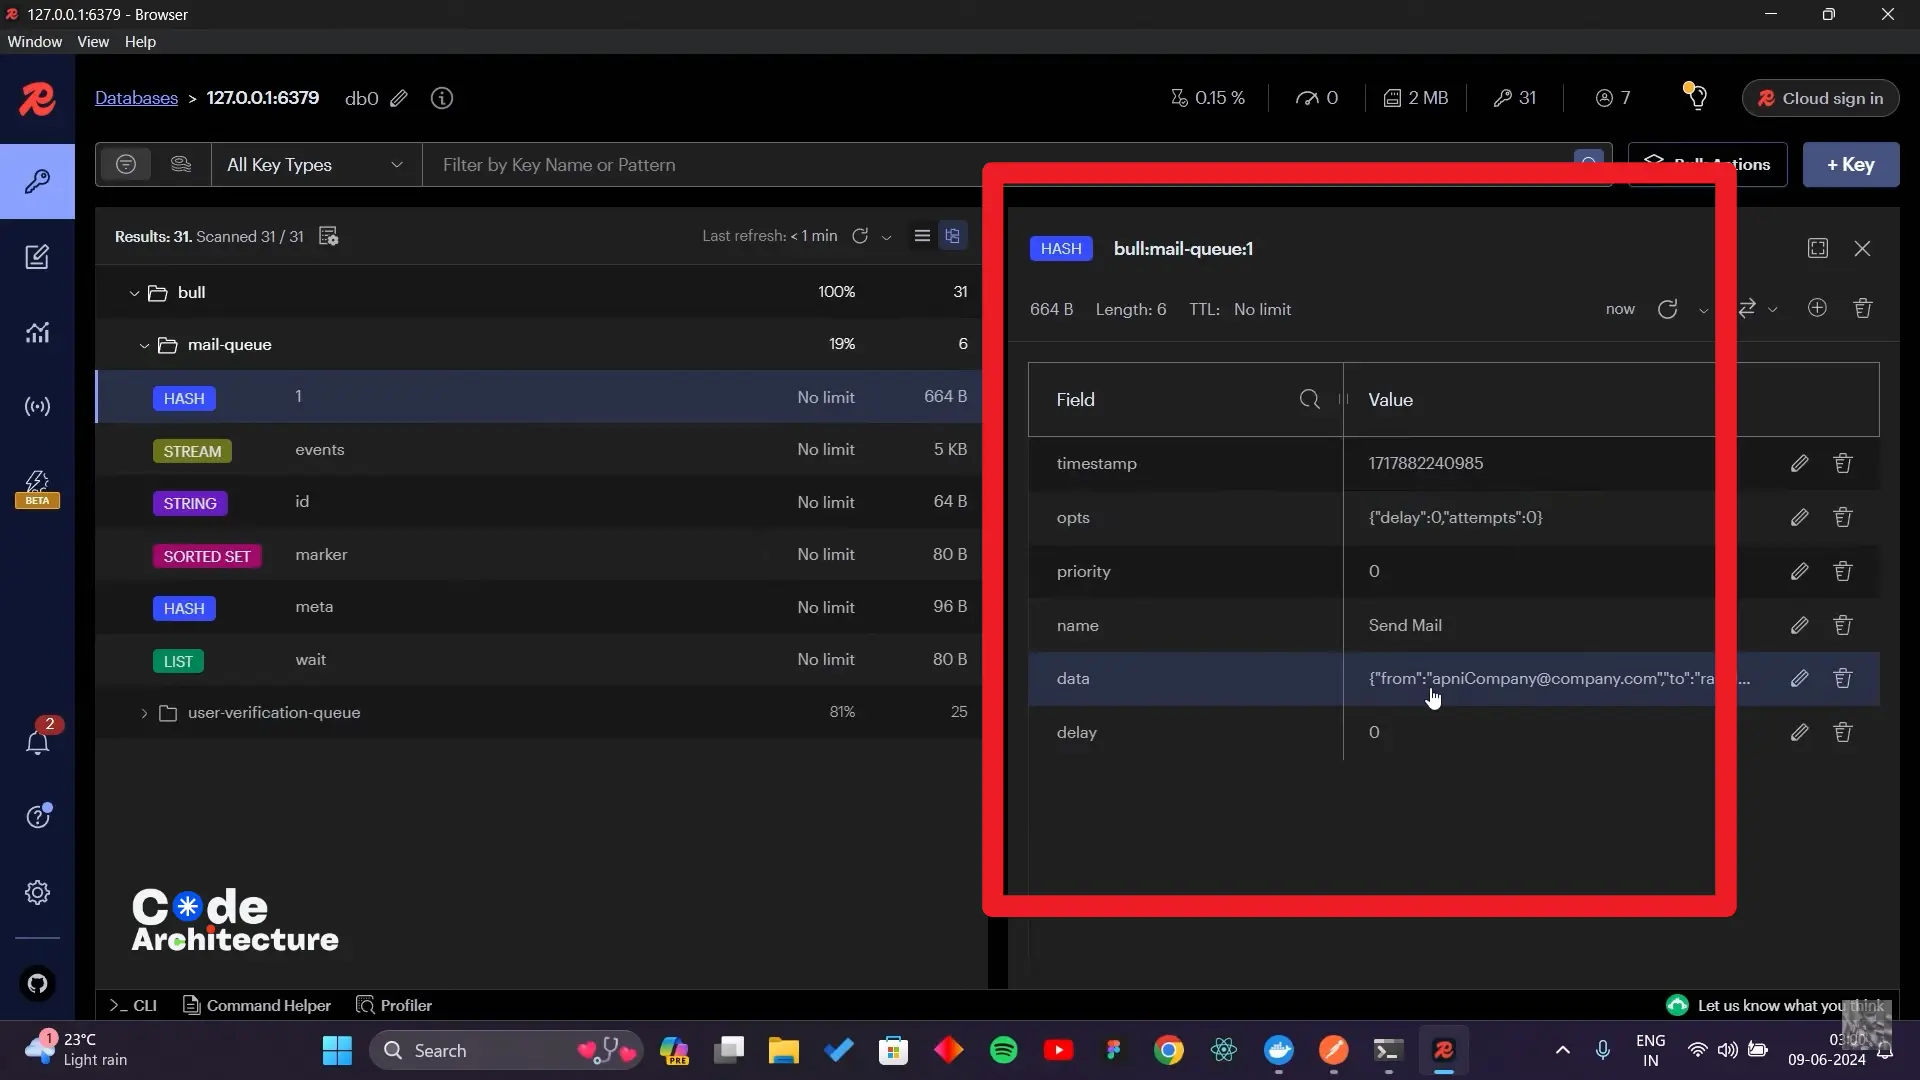
In the hash you can also check the data which you added to the queue!
Hope you like the article, Make sure to share this article with your friends and on social media ❤️